The Designer is a non-visual component that acts as a ‘wrapper’ around the report designer window displayed in the end-user reporting solution. By setting the various properties and events of the designer component, you customize the content and behavior of the report designer. The most commonly used properties of the designer component are listed below:
| Property | Description |
| AllowDataSettingsChange | Change Used to control whether the DataSettings menu option appears in the File menu of the data workspace. Usually disabled to prevent end users from changing the database settings. |
| AllowSaveToFile | When set to True, the File menu of the design workspace has ‘Load from File’ and ‘Save to File’ menu options. |
| DataSettings | DADE only. Used to configure DADE (data workspace) for a given database. |
| Icon | The icon to be displayed on the report designer window. |
| RAPInterface | RAP Only. RAP configuration settings. |
| RAPOptions | RAP Only. Further RAP configuration settings. |
| Report | The report object that will be used to load and save reports. The configuration of the Report.Template properties are used by the report designer to determine how reports will be loaded and saved. |
| ShowComponents | Determines which components will be displayed in the ReportBuilder component palettes. Sometimes used to disable advanced components such as regions or subreports. |
| TabsVisible | Determines whether the Design and Preview tabs will display. When set to false, the report designer becomes a ‘design only’ window, where the end-user can work on the layout, but cannot preview. If DADE or RAP is installed, then this property cannot be set to False. |
A Simple End-User Report Solution
We can create a simple end-user reporting solution using just a designer component and a report.
- Create Report and Designer components
Place a designer component and a report component on a form, and connect the report to the designer by assigning the Designer.Report property.
- Create data access components
Create data access components to supply data to the report. Here we have created TTable, TDataSource, and TDBPipeline components.
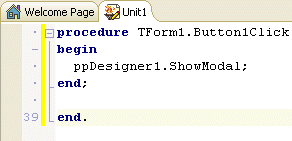
- Create a button to launch the report designer.

- Code the OnClick event of the button to launch the designer.
- Run the application and click the ‘Design’ button to launch the designer.
The user can now design a report based on the customer table. The report layout can be saved to a file, or pre-existing layouts can be loaded from file. Reports can only be created based on the customer table, since that is the only table available to the report.
While this end-user solution is simple and easy, it does have some limitations:
- This approach does not provide a data workspace where different data besides the customer table can be accessed.
- The ability to save or open reports layouts to file is dialog-based, and therefore the user does not have a way to organize and keep track of the many reports they may create.
These limitations can be addressed with additional functionality available in ReportBuilder Professional (namely DADE and the Report Explorer). These solutions are discussed at length throughout this section of this website.